
Blog
Comprehensive Guide to AOS 3.5 GEP-F722 Soldering: Techniques, Tips, and Best Practices
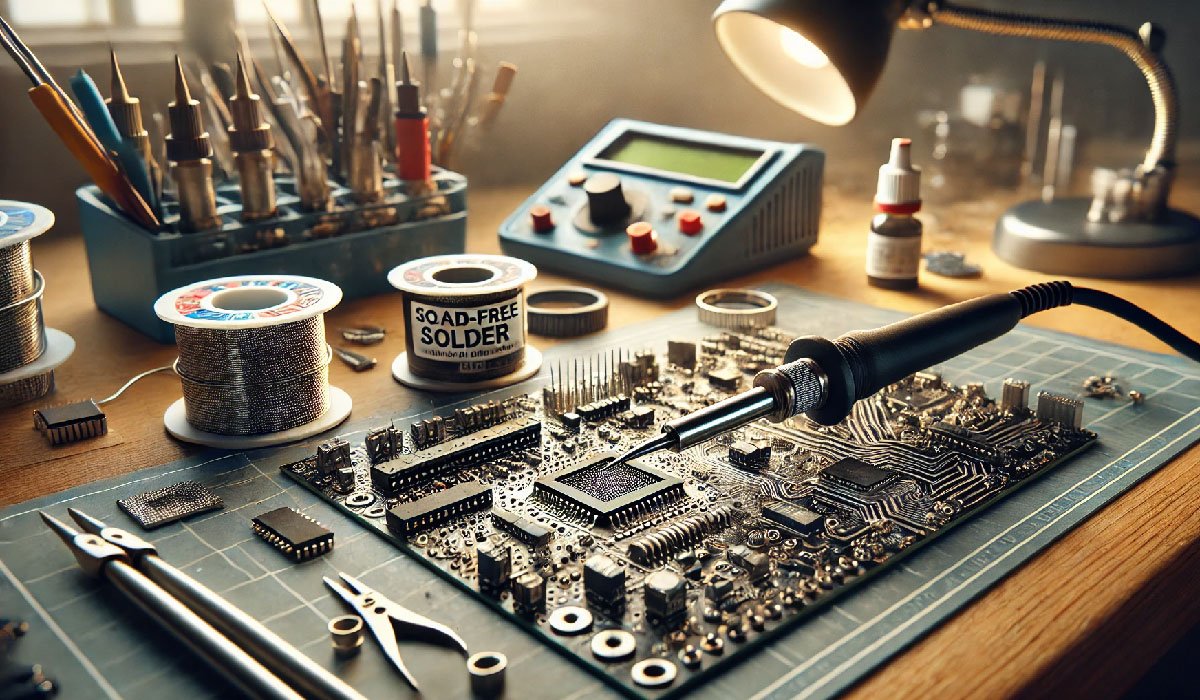
Soldering is an essential skill in the field of drone technology, particularly when working with high-performance flight controllers like the AOS 3.5 GEP-F722. This guide provides a deep dive into everything you need to know about soldering this advanced device, ensuring your drone operates at peak efficiency.
Introduction to AOS 3.5 GEP-F722 Soldering
The AOS 3.5 GEP-F722 is renowned in the drone community for its robust capabilities and the critical role it plays in enhancing drone performance. Soldering, the process of joining electronic components with molten metal, is fundamental in assembling and repairing these flight controllers. Proper soldering techniques are crucial for ensuring that these devices function optimally, as poor soldering can lead to faulty connections and potentially damage the sophisticated electronics.
Understanding AOS 3.5 GEP-F722
Overview of the AOS 3.5 GEP-F722
The AOS 3.5 GEP-F722 flight controller is designed for precision and performance. It features an advanced F7 processor, multiple UARTs for versatile connectivity, and an integrated OSD for real-time data display. The frame is tailored for 3.5-inch propellers, offering a perfect balance of agility and stability in flight, making it a favorite among both hobbyists and professional drone builders.
Importance of Proper Soldering
Soldering directly influences the performance and longevity of the AOS 3.5 GEP-F722 by ensuring solid and reliable electrical connections. Poor soldering can lead to intermittent connections or, worse, complete failure of the device during critical operations. Understanding the risks associated with improper soldering—such as cold solder joints, overheating components, and potential short circuits—is essential for anyone involved in building or maintaining drones.
Preparing for Soldering
Necessary Tools and Materials
To achieve the best results, you’ll need the right tools and materials:
- A high-quality soldering iron with temperature control
- Lead-free solder or 60/40 rosin-core solder
- Flux to improve solder flow and prevent oxidation
- Solder wick or desoldering pump for corrections
- Wire cutters and strippers
- Multimeter for testing connections
Workspace Setup
Setting up an effective workspace is crucial for safe and efficient soldering:
- Ensure the area is well-ventilated to avoid inhalation of toxic fumes.
- Good lighting is essential to clearly see the small components you will be working on.
- Organize all tools and materials within easy reach to streamline the soldering process.
Soldering Process Detailed Guide
Step-by-Step Soldering Instructions
The process of soldering the AOS 3.5 GEP-F722 involves several key steps:
- Iron Preparation: Start by tinning the tip of your soldering iron. This involves melting a small amount of solder onto the tip to improve heat transfer.
- Pad Preparation: Apply a thin layer of flux to the pads on the GEP-F722 board where components will be attached. This prevents oxidation and improves solder flow.
- Component Placement: Place the component on the board and hold it steady. Apply the iron tip to the pad and the component lead simultaneously and feed in the solder until it flows smoothly.
- Inspection and Cleanup: Check each joint to ensure it is shiny and well-formed. Clean the board with isopropyl alcohol to remove any residual flux.
Advanced Techniques
For those looking to elevate their soldering skills, consider these advanced techniques:
- Surface Mount Device (SMD) Soldering: This requires a steady hand and a fine-tip soldering iron. Practice makes perfect, so start on larger SMDs before moving to smaller ones.
- Drag Soldering: Useful for multiple pin components, this technique involves dragging a blob of molten solder across a row of pins, quickly and efficiently soldering them all at once.
Read Also: Unlocking Game Potential: How to Do NPC Dice Ace Swade in Your RPG Campaigns
Testing and Troubleshooting
Testing Connections
After soldering, it’s crucial to test your connections:
- Use a multimeter to check for continuity between points. This ensures that all connections are secure and there are no shorts.
- Visual inspection can help spot issues like cold joints or solder bridges.
Common Soldering Issues and Fixes
Problems might arise during the soldering process:
- Cold Solder Joints: These occur when the solder does not melt completely. Reheat the joint and add more solder if necessary.
- Solder Bridges: Remove accidental bridges with a solder wick or pump.
- Overheating: If a component gets too hot, stop and allow it to cool before continuing.
Maintenance and Care
Post-Soldering Maintenance
Taking care of your tools extends their life and maintains their performance:
- Clean Your Iron: Wipe the tip with a damp sponge after every few joints to keep it clean and efficient.
- Inspect Your Equipment: Regularly check your soldering iron and replace the tip if it becomes pitted or corroded.
Longevity Tips for Your GEP-F722
To ensure the longevity of your AOS 3.5 GEP-F722:
- Store it in a static-free environment.
- Regularly check the solder joints for signs of fatigue or failure, especially if the drone has encountered impact or extreme conditions.
Real-World Applications
Case Studies
Several successful projects highlight the importance of good soldering practices:
- Drone Racing: A well-soldered GEP-F722 can significantly improve the response times and reliability of a racing drone.
- Aerial Photography: Stable and reliable connections contribute to the quality and stability of aerial video footage.
Conclusion
Mastering the art of soldering the AOS 3.5 GEP-F722 not only enhances the performance of your drone but also ensures reliability and safety in its operations. By following this comprehensive guide, you will gain the skills necessary to confidently tackle any soldering challenge that comes your way.
FAQs About AOS 3.5 GEP-F722 Soldering
What is the optimal temperature for AOS 3.5 GEP-F722 soldering?
For effective AOS 3.5 GEP-F722 soldering, the soldering iron should be set between 350°C and 400°C. This range helps ensure a strong solder joint while minimizing the risk of damaging sensitive components.
Which solder type is best for AOS 3.5 GEP-F722 soldering?
Use a high-quality, lead-free solder with a small diameter, around 0.5mm, for AOS 3.5 GEP-F722 soldering. This ensures precise application and strong, environmentally friendly joints.
How do I prevent solder bridges during AOS 3.5 GEP-F722 soldering?
To avoid solder bridges while working on the AOS 3.5 GEP-F722, maintain a clean, fine-tipped soldering iron, apply flux carefully, and use only the necessary amount of solder.
What are the signs of a poor solder joint in AOS 3.5 GEP-F722 soldering?
Poor solder joints in AOS 3.5 GEP-F722 soldering often appear dull, cracked, or blobby and may feel loose. A good solder joint should be smooth, shiny, and make a solid connection with the component leads and pads.
How can I correct a cold solder joint in AOS 3.5 GEP-F722 soldering?
To fix a cold solder joint during AOS 3.5 GEP-F722 soldering, reheat the joint until the solder flows freely. Add a small amount of fresh solder if necessary to ensure a proper connection.
What cleaning method should I use after AOS 3.5 GEP-F722 soldering?
After AOS 3.5 GEP-F722 soldering, clean the PCB with isopropyl alcohol and a soft brush or swab. This removes residual flux and prevents potential corrosion or build-up that could affect performance.
What safety precautions are essential for AOS 3.5 GEP-F722 soldering?
When performing AOS 3.5 GEP-F722 soldering, ensure good ventilation to avoid inhaling fumes, wear protective eyewear to guard against splashes, and keep your workspace organized to prevent accidents.
How do I use a desoldering braid in AOS 3.5 GEP-F722 soldering?
Place the desoldering braid over the excess solder on the AOS 3.5 GEP-F722 and then press the heated soldering iron onto the braid. The braid will absorb the molten solder, clearing unwanted connections.
What should I do if I overheat a pad during AOS 3.5 GEP-F722 soldering?
If a pad is overheated during AOS 3.5 GEP-F722 soldering, immediately cease heating, allow the pad to cool, and carefully inspect for damage. If the pad lifts or becomes disconnected, a professional repair might be necessary.
How often should I replace the tip of my soldering iron for AOS 3.5 GEP-F722 soldering?
Replace the tip of your soldering iron when it appears damaged or corroded, which can hinder heat transfer and affect the quality of your AOS 3.5 GEP-F722 soldering. Regular cleaning and maintenance can extend the life of your tip.
For More Information Visit Loopermagazine
Test post title
Test post title

The Digital Battery Passport: A Turning Point for the Battery Industry

Car Finance Scandal? Why PCP Claims Are Suddenly Trending

The power of proactive accounting: why UK small businesses can’t afford to fall behind in 2025

How Arе Employеrs of Rеcord Sеrvicеs Facilitating Workforcе Divеrsity and Inclusion?

How to Choose the Right Finish for Interior and Exterior Wood

Choosing the Right Roofing Solutions in San Antonio

Diesel Generator Alternators: The Power Behind the Power

No More Endless Missions — Buy GTA Money and Build Your Empire Fast

Who Is Jordan Broad?: The Untold Story of Ashley Broad Husband

Who Is Mary Ryan Ravenel?: Inside The Life Of Thomas Ravenel’s Ex-Wife

Who Is Noelle Inguagiato?: The Untold Story Of Jesse Watters Ex-Wife

Who Is Dolphia Parker?: Everything About Dan Blocker’s Wife

Who Is Teddy Swims Girlfriend?: All About Raiche Wright

Who Is Micky Popovich?: Everything About Gregg Popovich’s Son

Who Is Jalynn Elordi:? The Untold Story of Jacob Elordi’s Sister

Who Is Lupe Gidley?: All About Christopher McDonald’s Wife

Who Is Ashley Anderson?: All You Need to Know About Dan Avidan’s Wife

Who is Asalia Nazario?: All You Need to Know About Zoe Saldaña’s Parents
-
 Celebrity1 year ago
Who Is Jordan Broad?: The Untold Story of Ashley Broad Husband
-
 Celebrity1 year ago
Who Is Mary Ryan Ravenel?: Inside The Life Of Thomas Ravenel’s Ex-Wife
-
 Celebrity1 year ago
Who Is Noelle Inguagiato?: The Untold Story Of Jesse Watters Ex-Wife
-
 Celebrity1 year ago
Who Is Dolphia Parker?: Everything About Dan Blocker’s Wife